
Bathroom Upgrade - DIY
- Crys Kevan Lee
- Mar 2, 2022
- 3 min read

Updated: Mar 14, 2022
To see the design process and get all the links visit this post.
When we were making choices for building our home we chose to upgrade the countertop in our main bathroom, but not the cabinet color. This was the first project in our home - painting the bathroom cabinets from brown to blue.

We looked around online, found a few colors we liked. Then I looked at Home Depot for paint colors offered in their Cabinet & Trim Enamel paint line. I wanted to paint the cabinets and never worry about them scratching. This is the product I ended up going with.

Due to the nature of the paint thickness, I was unable to use a paint sprayer. I could have used things to increase the viscosity so it would have sprayed better, but I didn't want to disrupt the integrity of the paint.
First, I primed the cabinet base- it was a clear primer and then painted. I also did the cabinet drawers and doors for our second upstairs bathroom as well.


I sanded in between coats. This paint has a self leveling property so help the cabinets have a smoother looking sheen.
Once I finished the cabinets I took a break. I finished painting the cabinets in May 2020 and started working on the mirror and the shiplap backsplash in October 2020.
The started this project by removing the builder-grade mirror.
First I taped off the mirror to help with any cracking -the mirror actually came off in one piece and we gave it to a friend to help them finish their gym. I used shims and a mallet to help detach the mirror from the glue used to holding it up. I patched and sanded down the areas where the glue remained.
We added 7.5 inch matte black pulls and round black knobs from Amazon.


After I got off the mirror I got started on the shiplap. I used pre-primed tongue and groove pine boards from Home Depot 7.25 inches wide.
I was so nervous. This was my first time putting up shiplap, but it was super easy. I used a table saw to rip down the first one and a brad nailer top nail the shiplap. I used a jig saw to cut around the lights. I was super proud to get it done.


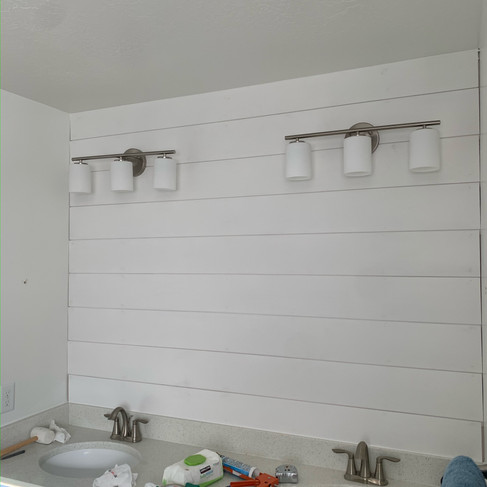
I ended up adding a 1/2 inch trim. on each side for a more polished finish.
Next step was to add mirrors:
I got these mirrors at Target as part of the Threshold Studio McGee Line. They might have a similar version now, you will just need to check.

This looks nice, but there was still a little more to do.
I took off the towel holders and replaced them with hooks. I feel like hooks allow towels to dry quicker and they are easy to keep towels looking nice.
Here is the final full-designed look of the bathroom. We use the tray in the middle to keep all of our products that we use regularly, but plants look less messy in a photo. The cabinets and pulls have held up great over the last 2 years. No scratches or chips, I would recommend the paint although it is a little thicker and takes more time to get right.


Let me know what you think in the comments.
I can help you create the vision for your space and give you a virtual blueprint to refer to as you have money or budget to bring it to life. I can help you plan out the necessary DIY and give you the confidence you need to carry it out. I will make sure that the items selected are within a price range and budget you are comfortable with. DIY or Interior Design don't need to feel intimidating or be out of your reach financially. Shoot me an email and we can set up a time to chat and walk through the process.
Tools Used for This Project:
Tools are sometimes the most expensive part of a project, but now that I have these I don't need to buy them again for future projects.
Shims
Painter's Tape


Comments